Updated August 2026
A SharePoint help desk gives organizations a centralized way to collect, organize, track, and resolve IT support requests using Microsoft SharePoint. You can create a help desk in SharePoint using SharePoint lists, forms, views, permissions, and automation, or start with Microsoft’s built-in IT Help Desk SharePoint site template.
For organizations that already use Microsoft 365 or SharePoint, using SharePoint for a help desk can be an attractive alternative to purchasing a separate ticketing platform. However, a basic SharePoint help desk may require significant customization and ongoing maintenance to provide capabilities such as automated ticket routing, email-to-ticket, service-level agreements (SLAs), escalations, technician workload management, reporting, and self-service.
This guide explains how to create a SharePoint help desk, what you can accomplish with Microsoft’s SharePoint tools and templates, and when a purpose-built SharePoint help desk solution may be a better option.
Does SharePoint Have a Help Desk Template?
Yes. Microsoft provides an IT Help Desk SharePoint site template that gives organizations a starting point for creating an internal IT help desk. The template provides a preconfigured SharePoint site with components designed to help IT teams organize support requests and resources.
The Microsoft IT Help Desk template includes features such as:
- Tickets: A list for tracking IT support requests.
- Devices: A list for keeping track of devices and IT assets.
- FAQs: A place to provide answers to common support questions.
- Documents: A central location for IT support documentation.
- Home page: A starting point where users can find help desk resources.
- Quick links: Links to important IT support resources and destinations.
The template can be customized to fit an organization’s processes. Microsoft also notes that organizations can use the template with an existing ticketing system or use a Microsoft List to track support requests and assets.
What the SharePoint Help Desk Template Does Not Automatically Provide
The Microsoft template is best viewed as a starting point for a SharePoint help desk, rather than a complete IT service management platform. Organizations with more advanced requirements may need to customize the site or add workflows, applications, and integrations.
For example, a more sophisticated SharePoint help desk may need:
- Automated ticket assignment and routing
- Email-to-ticket functionality
- Automatic notifications
- SLA tracking and escalations
- Technician workload management
- Ticket prioritization
- Approval workflows
- Knowledge base and self-service functionality
- Advanced dashboards and reporting
- Asset and configuration management
- Integration with Microsoft Teams and other business applications
If your organization only needs a straightforward way to collect and track requests, the Microsoft template may provide a useful starting point. If you need a complete ticketing workflow, building those capabilities yourself can require considerably more configuration and ongoing maintenance.
Can You Create a Ticketing System in SharePoint?
Yes. SharePoint gives you the basic building blocks you need:
- Lists to store tickets
- Forms for submitting requests
- Views for organizing work
- Permissions to control access
- Power Automate for notifications and routing
With these pieces, you can build a simple ticketing system that captures requests and helps your team track them. The challenge is turning those basic components into something that feels polished, reliable, and easy for people to use.
How to Create a Help Desk in SharePoint
There are several ways to create a SharePoint help desk, depending on how much functionality you need.
If you want a quick starting point, you can begin with Microsoft’s IT Help Desk site template and customize it for your organization. You can also build a help desk from scratch using SharePoint lists, forms, views, permissions, and Microsoft Power Automate.
The basic process is to create a central location for submitting support requests, define the information captured for each ticket, establish a process for assigning and tracking requests, and automate repetitive tasks where possible.
The steps below walk through the key components of creating a SharePoint help desk and turning SharePoint into a functional ticketing system.
Step-by-Step: How to Create a Ticketing System in SharePoint
Step 1: Create a Ticket List
Start with a SharePoint list. This will act as your ticket database.
Recommended columns:
- Title
- Description
- Category
- Priority
- Status
- Assigned To
- Created By
- Created Date
- Due Date
- Attachments
This gives you a basic structure for capturing and organizing requests.
Step 2: Customize the Ticket Form
The default SharePoint form is functional, but not friendly. You can improve it using:
- Power Apps
- JSON formatting
- Conditional visibility for fields
For example, you can hide technician-only fields from end users or show different fields based on the category selected.
Step 3: Build Workflows in Power Automate
This is where your ticketing system starts to feel alive.
Common flows include:
- Send a notification when a new ticket is created
- Assign tickets based on category or priority
- Update the requester when the status changes
- Escalate overdue tickets
More advanced logic is possible, but it requires time and testing.
Step 4: Configure Permissions
Permissions are important for both security and usability.
Typical setup:
- End users: Add items and edit their own
- Technicians: Edit all items
- Managers: Full control
This ensures people only see what they should.
Step 5: Create Useful Views
Views make the system easier to navigate.
Helpful views include:
- My Tickets
- Open Tickets
- High Priority
- Closed Tickets
- Tickets Assigned to Me
You can also add filters, grouping, and conditional formatting.
Step 6: Add Dashboards
If you want reporting, you can use:
- Power BI
- List web parts
- Chart web parts
This gives managers visibility into workload, trends, and performance.
Step 7: Integrate with Microsoft Teams
Many organizations prefer to access tickets through Teams.
You can:
- Add the SharePoint list as a tab
- Send notifications to a channel
- Use adaptive cards for updates
This helps keep everything in one place.
SharePoint Help Desk Template vs. Building a Help Desk From Scratch
The Microsoft SharePoint Help Desk template and a custom-built SharePoint help desk serve slightly different purposes.
The template provides a starting point, while building a help desk from scratch gives you more control over how the system works.
| Approach | Best for | Considerations |
|---|---|---|
| Microsoft SharePoint Help Desk template | Organizations that want a quick starting point | Requires customization for more advanced workflows |
| Custom SharePoint help desk | Organizations with specific processes and requirements | Requires more configuration, testing, and maintenance |
| Purpose-built SharePoint help desk | Organizations that need a complete ticketing system in SharePoint | Provides more functionality without building everything yourself |
For a simple internal help desk, the Microsoft template may be sufficient. However, organizations with more complex IT support processes may find that extending SharePoint into a full ticketing system requires significantly more work than expected.
What Can a SharePoint Help Desk Do?
A SharePoint help desk can support many common IT service desk processes. With SharePoint, Microsoft Lists, Power Automate, Microsoft Forms, and other Microsoft 365 tools, organizations can create workflows for submitting, assigning, tracking, and resolving support requests.
A basic SharePoint help desk can support:
- Ticket submission and tracking
- Ticket categories and priorities
- Assignment to IT staff
- Status tracking
- Custom forms and fields
- Automated notifications
- Approval workflows
- SharePoint-based reporting and dashboards
- Document and knowledge resources
- Microsoft Teams integration
However, the amount of configuration required depends on how sophisticated the help desk needs to be. Features such as automated routing, email-to-ticket, SLA management, escalations, technician workload balancing, advanced reporting, and complex integrations may require additional configuration, custom development, or a purpose-built help desk application.
The key question is not whether SharePoint can be customized to support a help desk. It can. The question is how much time and ongoing maintenance your organization wants to invest in building and managing those capabilities.
Limitations of a DIY SharePoint Ticketing System
Building your own ticketing system in SharePoint is possible, but it comes with tradeoffs.
Workflow Complexity
Power Automate can handle basic flows, but advanced routing, SLAs, approvals, and multi-step logic require significant configuration or custom development.
Missing Advanced Features
SharePoint does not include:
- Email-to-ticket
- Knowledge base integration
- Technician workload balancing
- AI routing
- Modern dashboards
- SLA timers
- Auto-escalation rules
You can build some of these, but it takes time and ongoing maintenance.
Scalability and Performance
As ticket volume grows, lists can slow down. You may need to restructure your data or archive older tickets.
User Experience
Creating a polished, intuitive interface in SharePoint is harder than it looks. Many DIY systems end up feeling clunky, which hurts adoption.
Maintenance Burden
If the person who built the system leaves the company, you may be stuck with something no one knows how to update.
Benefits of Running a Ticketing System in SharePoint
Even with the challenges, there are real advantages:
- You stay inside Microsoft 365
- Permissions and security are already in place
- You avoid paying for a separate SaaS tool
- You can customize the system to your needs
The question becomes whether you want to build everything yourself or use a solution that already does the heavy lifting.
A Better Option: NITRO Help Desk for SharePoint and Microsoft 365
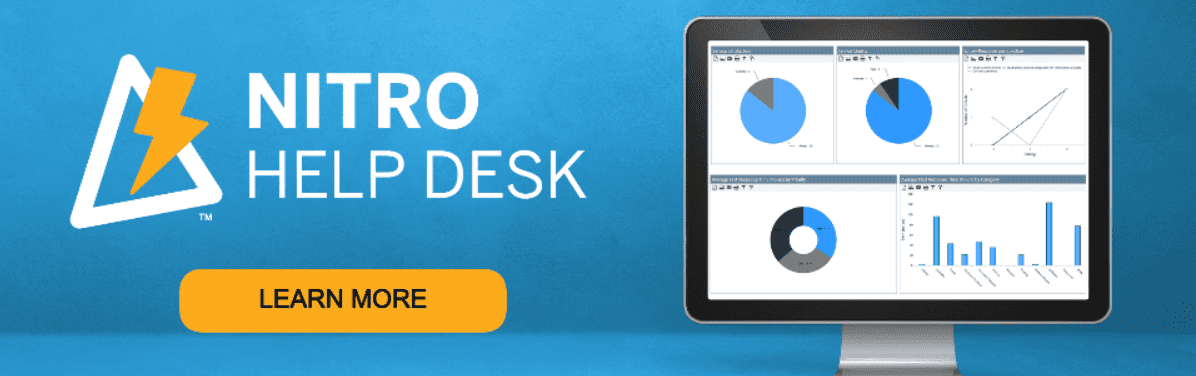
If you want the benefits of SharePoint, Teams, and Microsoft 365 ticketing system without the DIY workload, NITRO Help Desk gives you a complete ticketing system that installs directly into your SharePoint, M365, and Teams environment.
It includes:
- A modern, intuitive interface for both technicians and end users
- Email-to-ticket conversion
- Teams message-to-ticket conversion for true Microsoft Teams ticketing
- AI-powered ticket suggestions
- Built-in dashboards and reporting
- Advanced workflows
- Knowledge base integration
- Mobile-friendly design
- Configurable forms and routing
- SLA tracking and escalations
You get the flexibility of SharePoint with the functionality of a full helpdesk platform, without having to build or maintain everything yourself.
DIY SharePoint vs NITRO Help Desk: Side-by-Side Comparison
| Feature | DIY SharePoint | NITRO Help Desk |
|---|---|---|
| SLAs | Requires custom development | Built in |
| Email-to-ticket | Requires Power Automate | Built in |
| Dashboards | Requires Power BI | Built in |
| AI routing | Not available | Built in |
| Technician UI | Basic | Modern and responsive |
| Maintenance | High | Low |
| Setup time | Weeks or months | Ready to use |
When Should You Use a SharePoint Help Desk Solution Instead?
A SharePoint template or custom-built SharePoint help desk can be a good choice when your organization has relatively simple support requirements and has the time and resources to configure and maintain the system.
A purpose-built SharePoint help desk may make more sense when you need a ready-to-use ticketing system with more advanced functionality.
Consider a purpose-built solution if you need:
- Automated ticket creation from email
- Intelligent ticket routing and assignment
- SLA tracking and escalation
- Automated notifications and reminders
- Technician workload management
- Self-service capabilities
- Knowledge base integration
- Advanced reporting and dashboards
- Microsoft Teams support
- Integration with other Microsoft 365 applications
- Minimal custom development and ongoing maintenance
For organizations that want to keep their help desk within the Microsoft ecosystem, NITRO Help Desk provides a purpose-built ticketing solution for SharePoint and Microsoft 365. Instead of building every help desk function from individual SharePoint components and Power Automate workflows, organizations can start with a ready-made application and configure it around their existing support processes.
Final Thoughts
You can create a ticketing system in SharePoint, and for simple needs, it works. But once you start adding workflows, dashboards, routing rules, and user experience improvements, the DIY approach becomes a long-term project.
If you want a SharePoint-native solution that feels modern, powerful, and easy to maintain, NITRO Help Desk gives you everything you need without the complexity of building it yourself.
If you’d like to see how it works or talk through your requirements, our team is happy to help.