Want to print SharePoint list and form data? Our NITRO Print Manager tool offers many options for printing out various sets of data, from a single list item to a full list of list items. It goes beyond just printing to a piece of paper. You can also save the data as a PDF, a PNG image file, or to a document stored on SharePoint. Let’s take a look at some of the use cases and how the Print Manager would be configured.
Use Case 1
Need: An audit report of Work Orders completed in a given month
Let’s say you have an auditor come through and they want to see all Work Orders completed for a particular location in the month of October 2020. No problem!
- First, you would create a view of your Work Orders list in SharePoint to show only tickets completed with a Closed Date between 10/1/20 and 10/31/20, inclusive, and for a particular location.
- Next, start setting up your Print Template by clicking on Print Settings. You can also get here from the List Settings page and from the NITRO Studio page for the site.

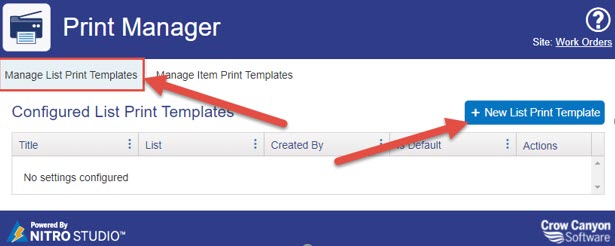
- Once in the settings page, select Manage List Print Template and then click on New List Print Template:
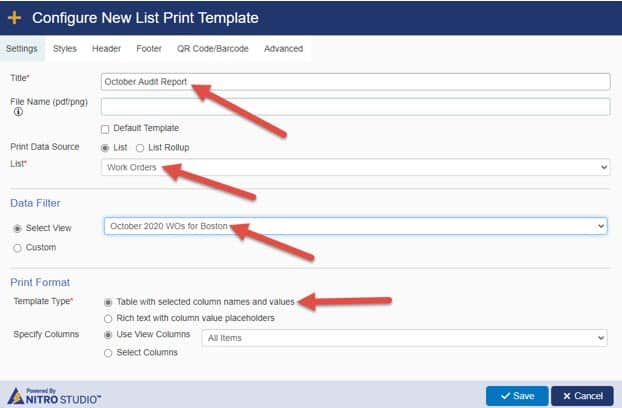
- Give the template a title, point it to the correct list, select your view created in Step 1, and then choose the “Table…” option. You can use the “Specify Columns” section to decide which columns are included in your printout.
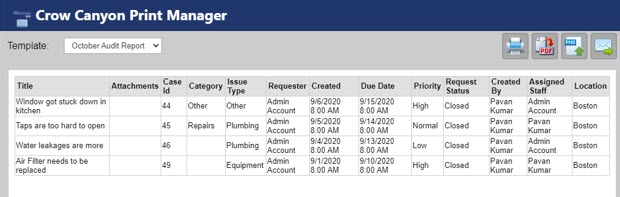
- On your list, and it doesn’t matter which view you’re in, you can select the List Print option and select your template. Then you’ll see what the printout will look like:

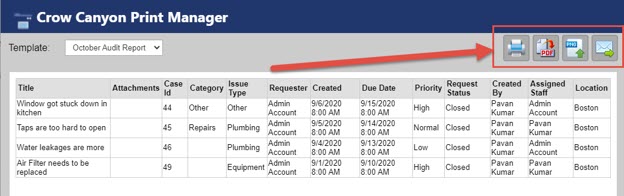
- From here you can Print, Save as PDF, Save as PNG, or send an email with the information:

Use Case 2
Need: Create a Purchase Order from information in a SharePoint list.
Let’s say you have a process where users are submitting requests for purchases. At the end of the process, you want to generate a Purchase Order (PO) for the requested items.
Typically, you can use the Associated Items option to capture the PO line items. The Print Manager allows for any number of line items, as long as you configure your template in the right way. You can then present those line items on the printout.
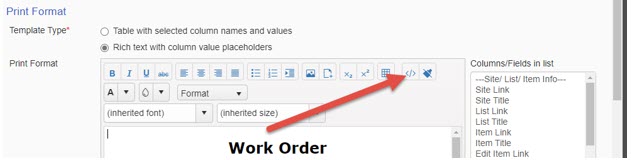
For this one, you’ll want to use the Item Print Template to print only one item at a time. You’ll also want to use the Rich Text editor to configure what the form will look like. Rich Text allows for configuring the look and feel via HTML as well. Here’s an example of a configured PO template:
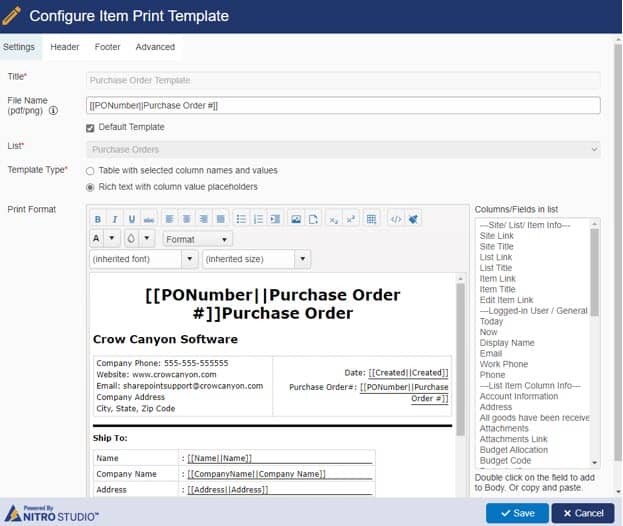
As you can see from the column on the right, you can take any of the list fields and put them in the context of the template.
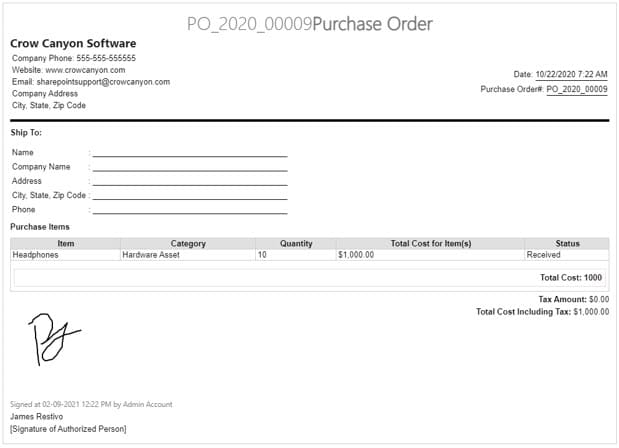
Here is what the printout looks like:
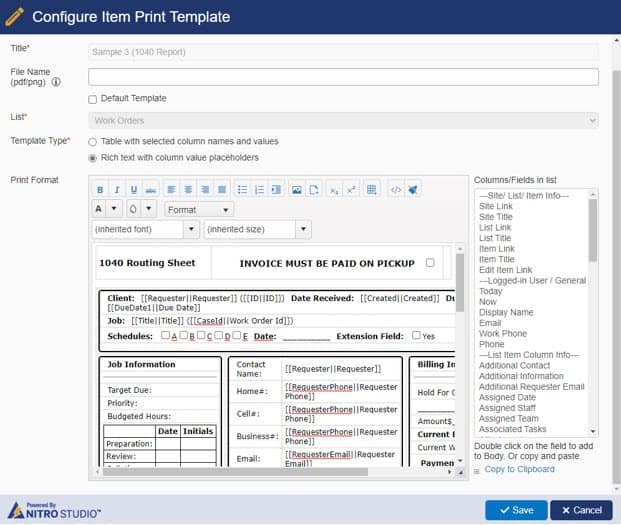
Another example of this is needing to print out a particular form in a particular format. Again, use the Item Print template with Rich text:
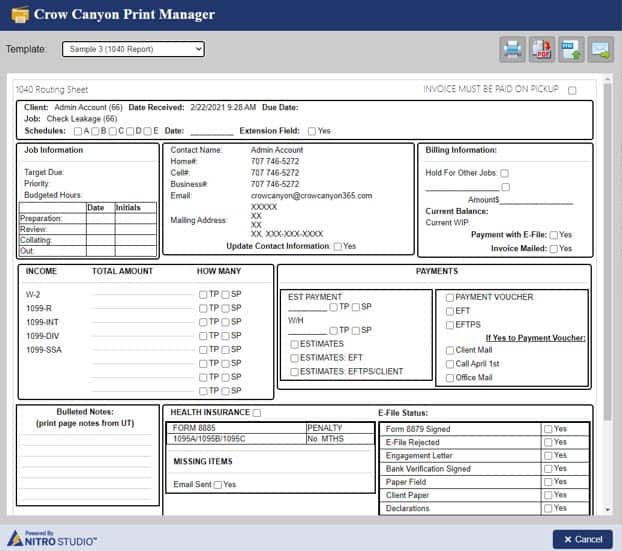
Here is what the printout looks like:
Use Case 3
Need: Print out daily Work Orders
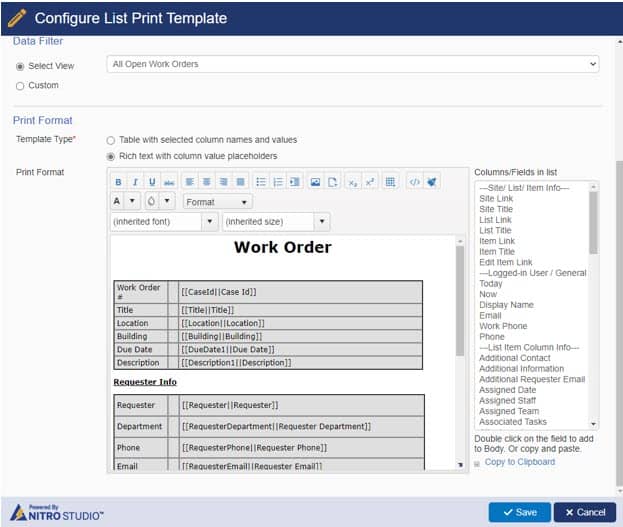
If you need to print out physical Work Orders, using the list print template will give you much greater flexibility in how those Work Orders are laid out. In this case, instead of a table, you can use the Rich Text option for printing out multiple Work Orders. Here is an example of a list print template for creating a work order:
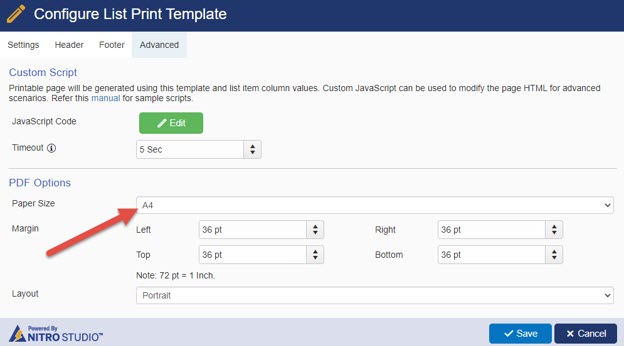
A couple of tricks to make sure this will look correct when printing out. First, make sure you configure your PDF settings on the advanced tab to be a normal page (i.e. A4 rather than auto):
Also, to achieve a page break automatically (at least in MS Edge with Chromium), use this style tag at the top of your HTML:
And add a div tag where you want the page break to occur:
Note about tables and HTML
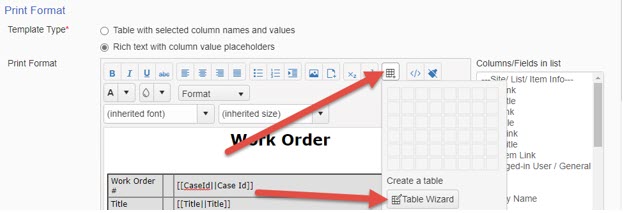
In the above examples I used a Table Wizard and some HTML manipulation to get the printout exactly the way I wanted. You can manage both of these things through the Rich Text editor in both the Item Print Template and List Print Template. To get to the Table Wizard, click on the table icon, and choose Table Wizard at the bottom:
The Table Wizard brings up several options:
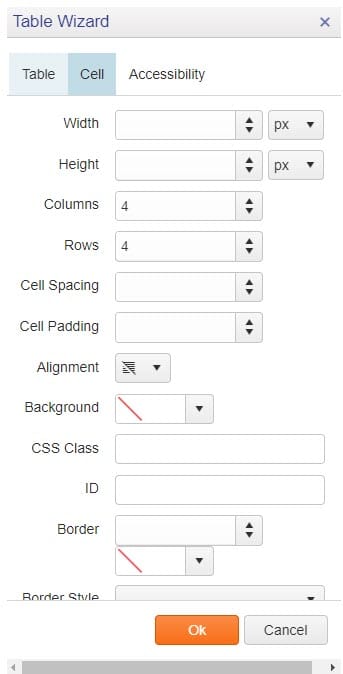
But be careful. Once you save the table to your editor there is no way to get back to the Table Wizard. Once you add the table to your editor, your best bet is to modify it through the HTML control.
This gives you an HTML editor screen where you can modify the HTML.
Recommendation: As you modify your template, whether you use the HTML editor or not, make sure to copy and paste the HTML periodically to a Notepad. That way, if anything gets messed up, you can copy and paste your HTML from the Notepad back to the HTML editor screen and you’ll be back to where you were!
There are other ways to print Sharepoint list and form data using the print templates including adding in Headers and Footers, using them for barcoding, etc. For more info, please refer to our NITRO Manual: NITRO Studio 2.0 (crowcanyon.info)